Making Olives
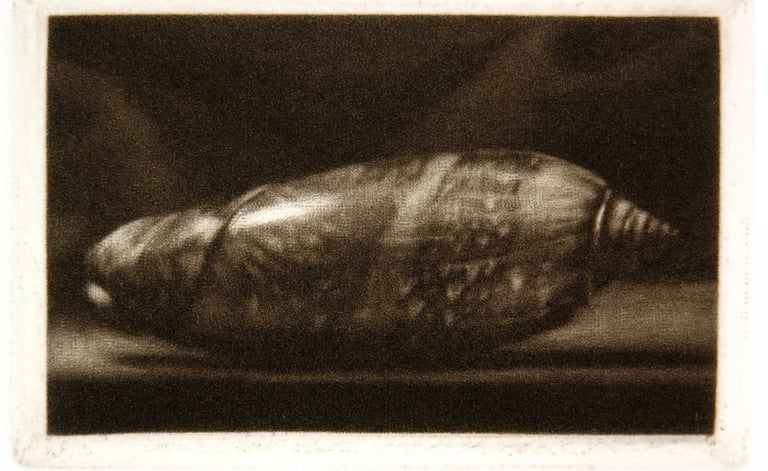
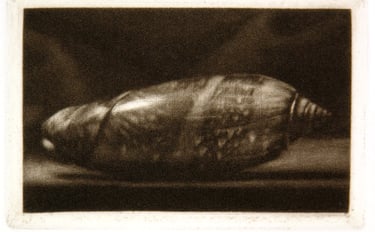

I made this first little olive print back in 2001. It is an olive shell from my great aunt Rita who lived in North Carolina. The shell in the print is actual size, and I scraped and burnished it from life, i.e., no photographs. Shell connoisseurs will immediately realize that this shell is backward—it spirals the wrong way. Because I worked from life on the plate, when it was printed, it naturally reversed.
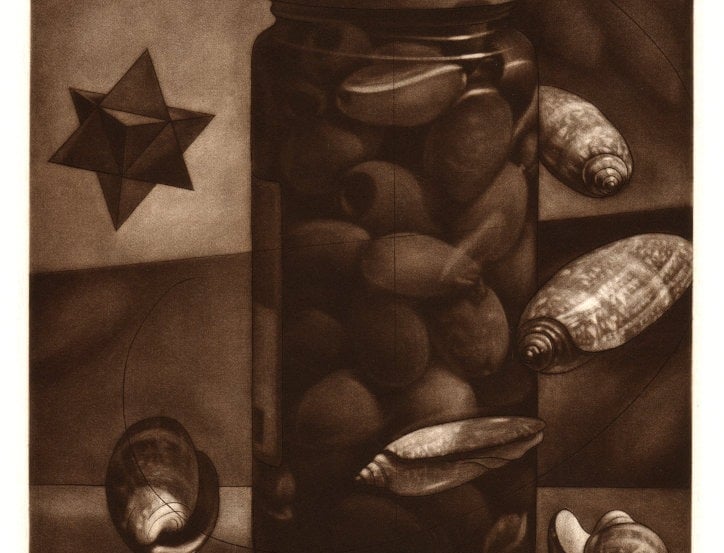
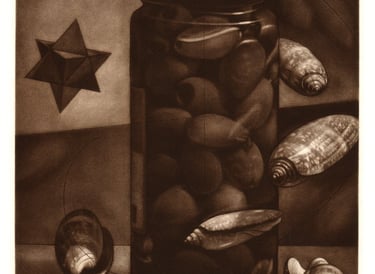
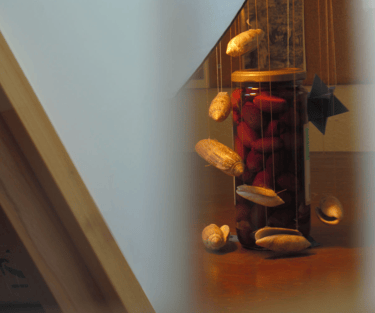
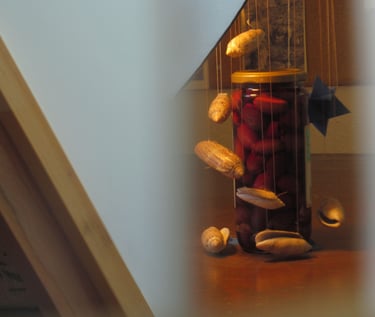
Seventeen years later, I revisited the olive shell idea, but I wanted to do it a little differently this time. The form of these shells is so intriguing. Just one shell in a static position doesn't do it justice. I wanted to represent olive shells from many different angles in a single print. I also wanted to include a jar of Kalamata olives—a nod to Chardin's famous Jar of Olives.
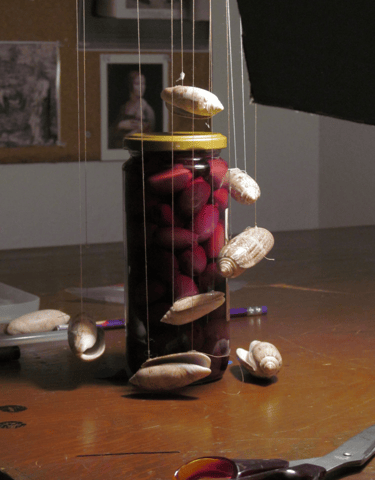
I toyed with a static arrangement of olive shells on the table around the olive jar, but it just seemed too limited. I had this crazy idea of a vortex of olive shells spiraling around the jar. But how to do it? I would prefer to work from life, as there is no substitute for the human eye when interpreting very subtle reflections and lighting effects.
This time around, I also wanted to make sure the shells were not reversed in the final print. My solution was to make an elaborate "mobile" of shells suspended around the olive jar. I drew this from life on paper, then transferred the drawing to my plate using the beeswax transfer method. This would ensure that the shells in the final print would read "right."
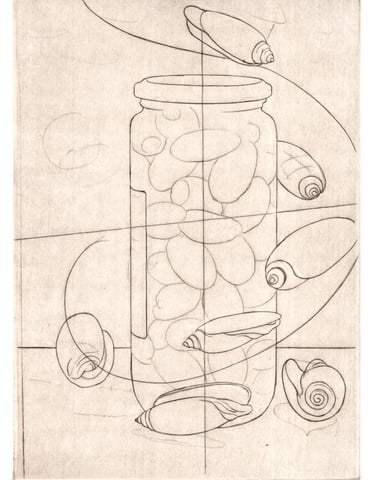
Once the drawing was transferred, I scratched the essential contours onto the plate, creating a light drypoint. I followed this with light line engraving over areas that I knew I wanted to emphasize: the bottom edges of the jar, the contours of the shells, etc. Here is the resulting print. Note that none of the Kalamata olives inside the jar are engraved. They were left as drypoint lines, because I wanted the outlines to disappear once the mezzotint ground was rocked on the plate. Also notice that the polyhedron on the left, a stella octangula, is not there yet. I knew I wanted something in that spot, but hadn't decided what yet.
I then rocked a mezzotint ground over the entire plate.
When I began to scrape and burnish the plate, I realized I was in a pickle. The "mobile" of olives was still set up, but now, because of the beeswax transfer, the image on my plate was backward, relative to the still life in front of me. The easy solution would be to photograph the setup, then digitally reverse it and work from the reversed photograph. But, as I have said, I always prefer to deal with the complexities of light with my own eyes, rather than a camera's flattened, abstracted interpretation of those complexities.
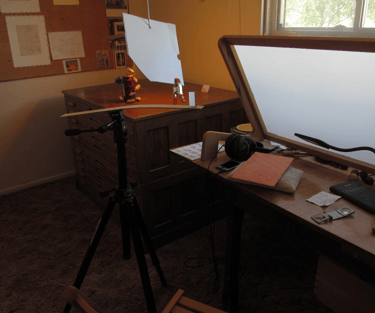
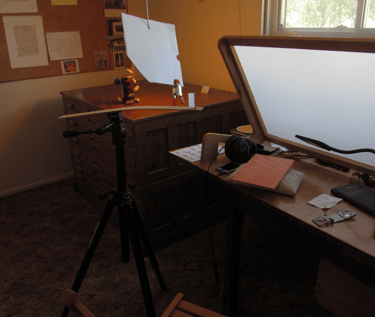
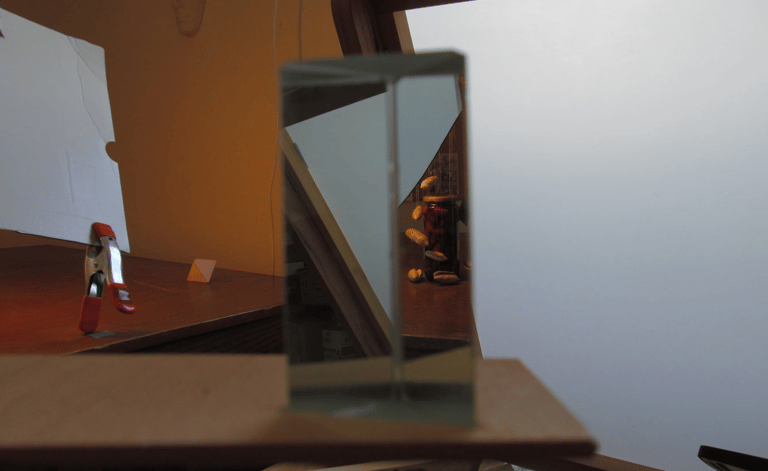
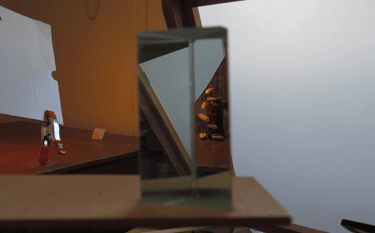
My solution was to rig up a prism to reverse the still life. I had toyed with using a mirror, but the double reflection from the glass and the silvering was distracting, and I had to turn away from the still life to draw it. The prism allowed me to face the still life, and the image in the prism was much sharper than a standard glass mirror.
But why stop there? Why not make this Rube Goldberg machine of a still life even more complicated? I decided stereo vision was far superior to mono vision, so I set up two prisms on my jury-rigged tripod stand.
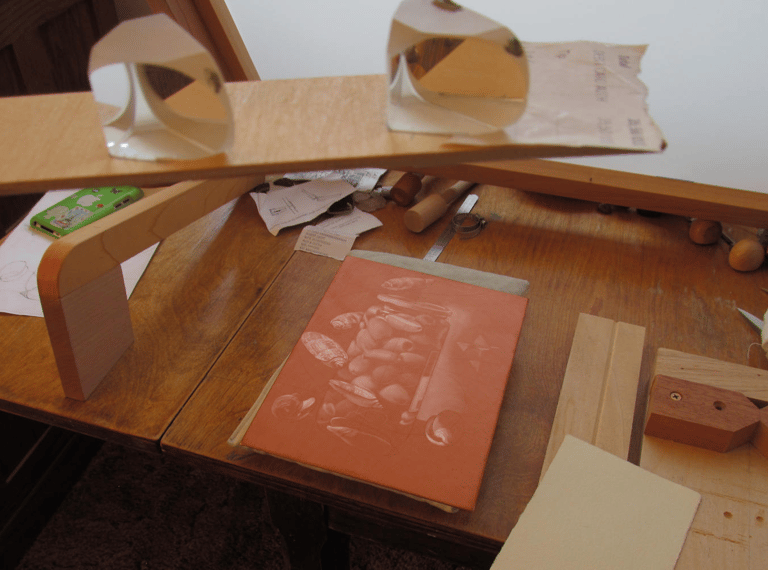
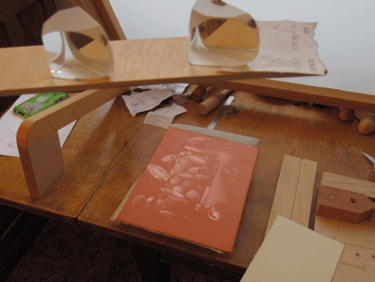
You can see the mezzotint plate in progress below the prisms. I usually do not go to such absurd lengths to make prints, but in this case, the situation demanded it. I wish there were some optical prism glasses that would reverse everything you see. If you know of something like that, let me know.
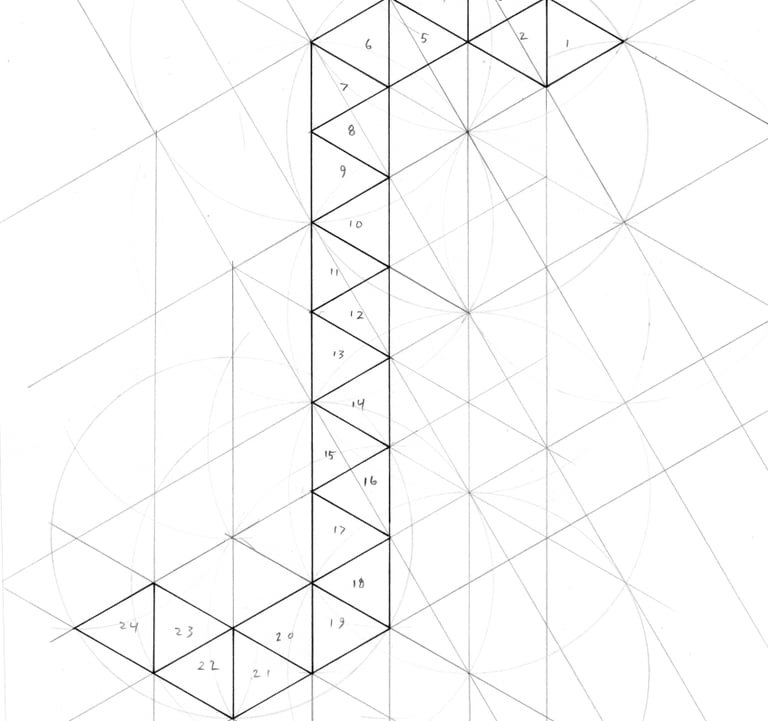
As a sort of postscript, here is the net I made for the stella octangula seen on the left side of the print. I initially tried to use one of John Montroll's origami versions, but decided to make my own out of heavy paper. My first attempt at the net failed. This is the second. Luckily equilateral triangles are one of the easiest things to make with a compass and ruler. Contact me if you would like a free full-size PDF of the net.